I’ve torn out enough failed bathrooms to know that shower wall tile is rarely the part that caused the leak. The real trouble is usually behind it: bad waterproofing, a loose backer board, a missing seal at the valve, or tile installed over a wall that moves. Still, the tile matters. Choose the wrong material or size and you’ll spend every Saturday scrubbing grout instead of enjoying the bathroom you paid for.
For most homeowners, the sensible choice is glazed porcelain or ceramic tile from a reputable manufacturer. It does not need to be exotic, oversized, or imported from a showroom with marble floors. It needs a flat wall, a proper waterproofing system, correct thinset, and clean grout joints.
Ceramic, porcelain, stone, or something else?
Ceramic remains the best value for many shower walls. A quality glazed ceramic tile is easy to cut, reasonably light, and available in nearly every color and shape. Common 3-by-6-inch subway tile often runs $2 to $6 per square foot, with premium versions reaching $10 or more. Daltile, American Olean, and Marazzi all make practical lines that I’ve installed repeatedly.
Porcelain is denser and generally more resistant to water absorption than standard ceramic. That makes it a good choice for a hard-working family bathroom, especially when you want large-format panels or a tile that continues from the bathroom floor into the shower. Expect roughly $3 to $12 per square foot for many porcelain options. Cutting it takes a better blade and a little more patience.
Natural stone looks good in a sample board and demands more maintenance in real life. Marble can etch, darken, and show hard-water deposits. Slate can shed layers if it is poorly selected or maintained. I’m not saying never use stone, but shower wall tile made from porcelain can give you the same visual effect without yearly sealing and nervous cleaning.
Glass mosaic has its place as an accent, not necessarily across every wall. More grout lines mean more places for soap residue to collect. If a salesperson tells you a full mosaic shower is automatically easier to clean, walk away slowly.

Pick a size that matches the wall, not the showroom
Large tile is popular because fewer joints can mean less grout to clean. That is true, but large tile is not magic. A 24-by-48-inch piece will expose every hump in an old plaster wall. In a 1920s row house, I would rather install a well-prepared 12-by-24 than wrestle giant panels onto framing that was never straight.
For a standard tub surround, 4-by-12, 4-by-16, or 12-by-24 tile usually gives a good balance. Smaller 3-by-6 subway tile works well around niches, benches, and plumbing walls because it can be adjusted without creating awkward slivers. Before buying shower wall tile, measure each wall separately. Do not assume the room is square because the drywall looks close.
Lay out the pattern from the centerline and keep cuts away from the most visible corners when possible. A half-inch strip beside the valve looks like a mistake. A balanced layout with two-inch cuts at both ends looks intentional. This is where ten minutes with graph paper can save several hours of expensive rework.
Waterproofing is not optional
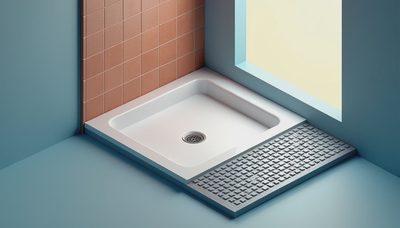
Tile and grout are water-resistant, not waterproof. That sentence should be printed on every bag of thinset in the country. Water gets through grout joints, corners, screw holes, and plumbing openings. The waterproof layer has to be behind the tile and continuous across the walls, floor, corners, and niches.
I’ve used Schluter-KERDI, Wedi panels, and liquid systems such as RedGard and Hydro Ban. All can work when installed according to their instructions. The failure usually comes from mixing systems, skipping fabric at a corner, or applying liquid membrane too thin. A red wall is not proof of waterproofing; the membrane needs the manufacturer’s specified coverage.
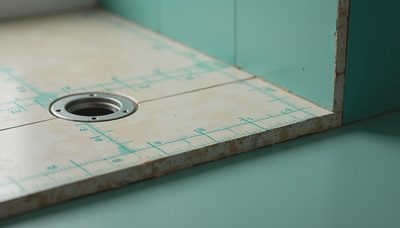
Use cement backer board or an approved foam board where appropriate, but do not treat ordinary green drywall as a shower substrate. Seal fasteners and transitions exactly as the system requires. Around a shower valve, use the correct seal or gasket. At the tub flange, bring the waterproofing into the right relationship with the flange so water cannot run behind the surround.
A bathroom built right once is a bathroom you forget about. That’s the point.
Grout, joints, and the maintenance question
For most walls, I prefer a 1/8-inch grout joint unless the tile manufacturer requires something wider. Rectified porcelain can sometimes use a tighter joint, but an old house rarely has walls flat enough for a hairline installation. Tight joints exaggerate uneven edges and leave less room to correct small layout errors.
Sanded grout is commonly used for wider joints, while unsanded grout suits narrow joints and can be easier on polished surfaces. Some installers use single-component or epoxy grout for extra stain resistance. Spectralock epoxy, for example, performs well, but it costs more and requires disciplined cleanup before it cures. It is not a license to leave grout haze until next weekend.
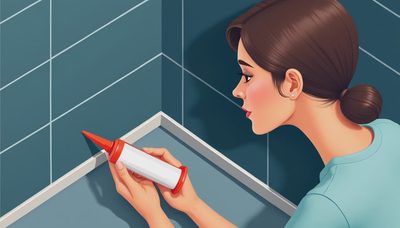
Use 100 percent silicone, not grout, at changes of plane: vertical corners, the wall-to-tub joint, and around many trim transitions. Grout in those moving joints commonly cracks. A matching silicone from brands such as ColorFast or Laticrete looks better than a bead of bright white caulk slapped over a gap.
When comparing shower wall tile, also look at the surface texture. Deep ridges and handmade-style waves can be attractive, but they catch mineral deposits and make a squeegee less useful. A lightly textured matte finish is usually easier to live with than a heavily sculpted surface.

What the project should cost
For a typical 60-by-30-inch tub surround, the tile itself might cost $300 to $900, depending on size, brand, trim, and waste. Add backer board or waterproof panels, thinset, grout, sealant, profiles, and tools, and materials can land around $700 to $1,600. Professional installation often adds $2,000 to $5,000 when demolition, framing repairs, plumbing access, waterproofing, and disposal are included.
Those numbers climb quickly if the wall is out of plumb or the plumbing must move. A recessed niche can add several hundred dollars in labor. A bench, linear drain, complicated mosaic, or natural stone raises the time requirement. The cheap quote often becomes expensive after demolition reveals wet studs and rotten subfloor.
Get the scope in writing. It should identify the waterproofing product, substrate, tile allowance, grout type, niche details, trim, demolition, disposal, and flood testing where applicable. “Tile included” is not enough. One contractor’s allowance may cover basic ceramic; another may be assuming $12-per-square-foot porcelain.
A practical buying checklist
Start by calculating the wall area, then add 10 percent for ordinary layouts and 15 percent for diagonal patterns, mosaics, or difficult cuts. Buy the same dye lot when possible, and keep two or three spare tiles after the job. A dropped bottle years later is easier to repair when the replacement is sitting in your basement.
Check that the tile is rated for wall use and that its actual dimensions match the stated size. Open several boxes before installation. Shade variation can be intentional, but a box with damaged corners or obvious defects should go back before it reaches the wall.
Order trim pieces before the installation starts. Bullnose, pencil trim, metal profiles, and inside-corner details are not minor decorations; they determine how the finished edges look. If the tile has no matching trim, plan the edge with a profile such as Schluter JOLLY or a carefully polished cut.
Finally, do not let a tile choice dictate bad construction. If a particular shower wall tile requires a crooked wall, fragile edge, or maintenance routine nobody in your house will follow, choose another tile. Good materials cannot rescue careless prep.
The bottom line
The best shower wall tile is usually the one that suits the wall, the budget, and the cleaning habits of the people using the bathroom. Buy quality porcelain or ceramic, spend money on waterproofing and preparation, keep the layout balanced, and use flexible sealant at moving joints. I’d take an ordinary $4 tile installed over a properly waterproofed, flat wall over a $20 designer tile covering a shortcut every single time.
No notes yet — be the first to inscribe one.