If you are searching for how to replace subfloor, chances are your bathroom floor has already told you the answer. Maybe the toilet rocks, the tile grout keeps cracking, or one spot feels soft under your feet. Water damage does not improve with age. In an older house, especially one built before 1980, the subfloor can be swollen, rotten, or barely attached around the toilet flange.
Replacing it is not complicated carpentry, but it is unforgiving work. Cut too far and you damage plumbing. Leave soft wood behind and your new tile cracks. Install the wrong thickness and the toilet flange sits too low. I have repaired all three mistakes, usually after somebody spent a weekend trying to save $300 in labor.
Find the Damage Before You Cut
Start by removing the toilet, baseboard, and whatever floor covering is in the way. Shut off the supply valve, flush the tank, sponge out the remaining water, and disconnect the supply line. A toilet weighs enough to hurt your back, so get another person to help move it. Set it on a contractor bag, not directly on finished flooring.
Probe suspicious areas with an awl or flat screwdriver. Pay special attention to the toilet, tub edge, shower curb, and walls where old caulk failed. Sound subfloor resists the tool. Rotten plywood feels soft and flakes apart. Mark the damaged rectangle with a chalk line, extending at least 6 inches beyond visible staining until you reach solid material.
Look below the floor if there is an unfinished basement or crawl space. A dark stain on top does not tell you whether the joist is damaged. A joist with surface discoloration may be fine after drying, while a joist with crushed fibers or deep rot needs repair. If the damage reaches a load-bearing wall, wiring, or major plumbing, stop and bring in a qualified contractor. This is where learning how to replace subfloor turns into structural work.
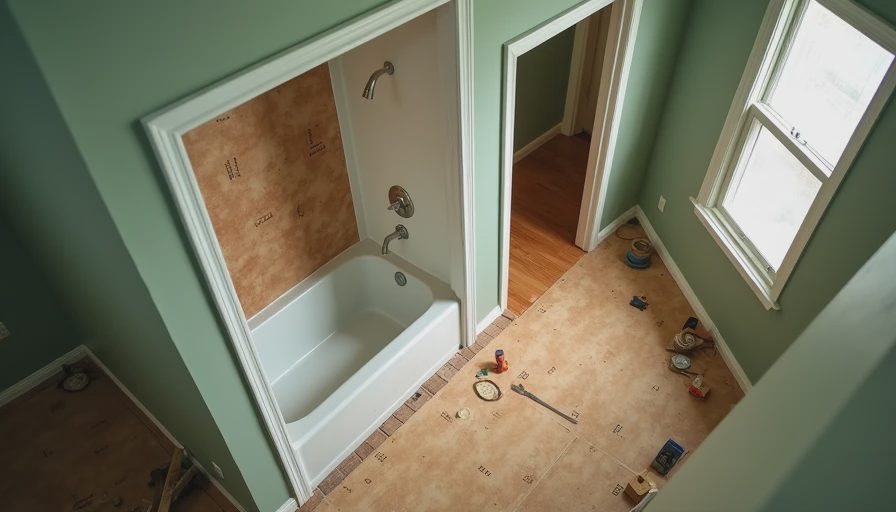
Cut Out the Bad Plywood Safely
Set the circular saw depth to the subfloor thickness, usually 3/4 inch in older bathrooms, and confirm it with a drill hole or exposed edge. Do not guess. Set the blade slightly shallower than the wood so you do not slice a water line or electrical cable below it. Make straight cuts along your marked lines, stopping about 2 inches from walls and pipes. Finish corners with an oscillating tool or handsaw.
Before lifting the panel, drive a few screws into the section to give yourself handles. If it will not lift, check for hidden nails, adhesive, or a pipe crossing underneath. Never pry aggressively beside a toilet drain. Cast-iron and old PVC fittings can crack, and replacing a drain is a far worse Saturday than replacing plywood.
Remove every loose fragment, then vacuum the opening. Check the joist tops with a level and inspect the blocking between joists. Where a joist top is slightly damaged, sister it with a straight piece of dimensional lumber fastened with construction adhesive and structural screws. For serious rot, call someone who can evaluate the framing properly. New plywood over weak framing is just expensive camouflage.
Choose the Right Replacement Material
For a bathroom floor, use exterior-glue plywood rated Exposure 1, not particleboard or MDF. A 23/32-inch tongue-and-groove panel is the normal choice when the original floor is 3/4 inch. If your existing floor is 5/8 inch, match it rather than creating a hump. I generally buy APA-rated plywood from a lumberyard instead of the cheapest smooth panel at a big-box store.
Dry-fit the replacement before applying adhesive. Leave a 1/8-inch gap at walls and around fixed objects so the wood can move slightly without buckling. The patch should land on joists or solid blocking on every edge. If an edge floats between joists, add blocking underneath. A patch supported on three sides is not a proper patch, no matter how much adhesive you use.
A typical bathroom repair uses $60 to $150 in plywood, screws, adhesive, and blocking. Add $30 to $75 for a new toilet wax ring or suitable gasket. If the floor is open for several days, keep the room dry and cover the opening securely. Falling into a hole is an embarrassing way to explain a renovation injury.
Fasten the Patch Like You Mean It
Spread a compatible construction adhesive on the joist tops and blocking. Use coated structural screws or approved subfloor screws, not drywall screws. Drywall screws are brittle and have poor holding power. Drive fasteners about every 6 inches along supported edges and every 8 inches in the field, keeping them clear of pipe routes.
Set the panel into place and press it level with the surrounding floor. Stagger seams if you are replacing multiple sections. Do not force a swollen panel into a gap by pounding it sideways; trim it instead. Screw the patch down while the adhesive is still workable. A squeak now usually becomes a cracked grout joint later, so walk the area and add fasteners wherever movement remains.
This is the practical core of how to replace subfloor: solid support, correct thickness, tight fastening, and no trapped moisture. The work is not glamorous, but tile rewards boring preparation.

Prepare for Tile, Vinyl, or a New Toilet
Once the patch is secure, check it with a long straightedge. A floor can be structurally strong and still too uneven for tile. Sand small high spots and use a compatible floor patch for shallow dips. Do not use leveling compound to hide a soft joist or a loose panel. It will crack because the movement underneath is still there.
For tile, install the underlayment specified by its manufacturer. That might be cement backer board bedded in thin-set and screwed down, or an approved uncoupling membrane such as Schluter-DITRA. Backer board is not waterproof by itself, so areas near a shower still need a real waterproofing system. For sheet vinyl, the finished underlayment needs to be smooth enough that every screw head and seam will not telegraph through the flooring.
The toilet flange should sit at or slightly above the finished floor. If it is now too low because you added tile or underlayment, use a compatible flange extender or have the flange reset. Do not stack random wax rings and hope for the best. Install the toilet with a new seal, tighten the nuts evenly, and test for leaks before closing the wall or reinstalling trim.
When DIY Stops Making Sense
Knowing how to replace subfloor does not mean every bathroom floor belongs on your weekend list. Call a professional when the damage extends under a tub you cannot move, when joists are rotten, when the toilet drain is leaking below the floor, or when the room has complicated wiring and plumbing. A small inspection fee is cheaper than turning a $500 repair into a $4,000 demolition.
If you can reach the damaged area, identify the joists, and work patiently, a basic patch often takes a careful homeowner six to ten hours, including removal and cleanup. A contractor may charge roughly $500 to $1,500 for straightforward bathroom subfloor replacement, with the range rising quickly for framing, plumbing, or tile removal. Get the scope in writing so “replace the floor” does not mysteriously exclude blocking, disposal, or resetting the toilet.
The bottom line is simple: how to replace subfloor starts with finding the full extent of the damage, not covering the stain. Cut back to solid wood, support every seam, use the right plywood, and solve the leak before installing anything pretty. A bathroom built right once is a bathroom you forget about. That is the point.


No notes yet — be the first to inscribe one.