Shower valve replacement sounds like a small bathroom repair until you open the wall and find galvanized pipe, three generations of fittings, and framing that looks like it was cut with a butter knife. I have done enough shower valve replacement work to know the real question is not whether the trim is ugly. It is whether the valve is leaking, unsafe, impossible to service, or simply incompatible with the shower you want.
A shower valve mixes hot and cold water and controls the flow to the showerhead or tub spout. When it fails, you may get a weak stream, temperature swings, dripping after the handle is shut off, or no hot water at all. In an older house, replacing the cartridge can solve the problem. In other cases, the valve body itself has to come out.
Signs the valve itself needs attention
Start with the symptom, not the finish color. A handle that is hard to turn often points to a worn cartridge or mineral buildup. A shower that drips for several minutes after shutoff may need a cartridge, O-rings, or valve-seat work. If water appears behind the escutcheon plate, stop using the shower until you know where it is coming from. That can be a failed seal, a cracked valve, or a loose threaded connection.
Temperature is another clue. If the water changes from comfortable to scalding when someone flushes a toilet, the pressure-balancing part of the valve may be stuck or failed. Modern pressure-balancing and thermostatic valves are designed to reduce that problem, but they cannot compensate for a valve packed with sediment.
Do not confuse a bad showerhead with a bad valve. Remove the head and run water briefly into a bucket. If flow is still poor, the valve or supply piping deserves inspection. A $15 showerhead is a different repair from opening a tiled wall.
Shower valve replacement cost in a real bathroom
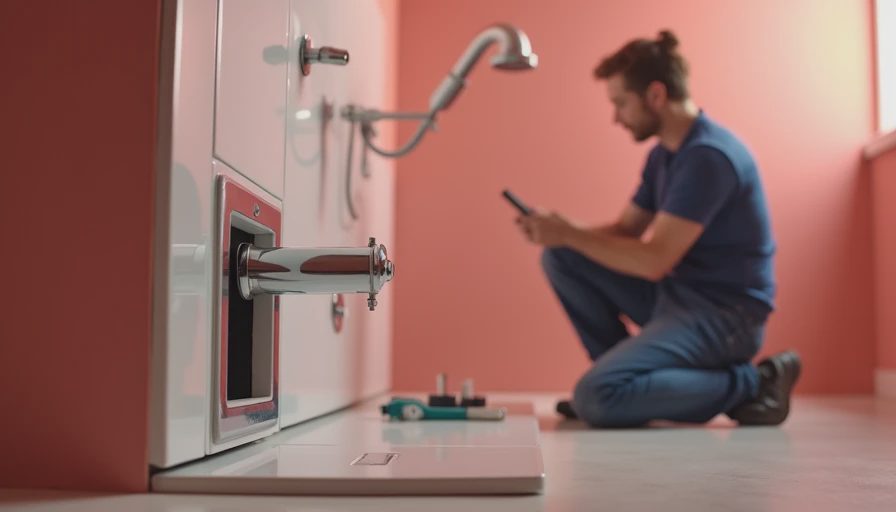
For a straightforward cartridge replacement, materials can run from $20 to $100, and a plumber may charge $150 to $350 for the visit and labor. That is not the same as full shower valve replacement. Replacing the valve body with access from an unfinished basement or an adjacent closet often lands around $500 to $1,200, including the valve and new trim.
If the only access is through finished tile, the total can reach $1,500 to $3,500. The plumbing is not necessarily expensive; the demolition, waterproofing, tile repair, and finish work are what move the number. A plumber may open a 12-by-18-inch section, install the new valve, pressure-test it, and leave the patching to a tile contractor. A full renovation is the better route when the existing surround is already loose, cracked, or missing proper waterproofing.
A useful budget example: a Delta MultiChoice valve might cost roughly $80 to $180 depending on the package, while a higher-end Hansgrohe or Kohler setup can run several hundred dollars before labor. Add copper, PEX, fittings, access-panel work, and tile materials. Anyone promising a universal $200 installed job without seeing the wall is selling you a number, not a solution.
Choosing a replacement valve that will not become tomorrow's problem
For ordinary family bathrooms, I have had good experiences with Delta and Moen pressure-balancing valves. Their cartridges are widely stocked, trim is easy to find, and a replacement part is less likely to require a desperate internet search six years from now. Kohler makes solid valves too, but confirm the exact rough-in and cartridge family before buying trim.
A shower valve replacement should include a valve with serviceable internals and a manufacturer whose parts will still be available. Avoid bargain fixtures with no clear model number. The shiny plate may look fine, but a proprietary cartridge that costs $90 and ships from nowhere is not a bargain.
Thermostatic valves offer more precise temperature control and can be worthwhile in a larger shower with multiple outlets. They cost more and require careful installation. A basic pressure-balancing valve is usually the sensible choice for a tub-shower combination. Spend money on accessible parts, solid connections, and proper waterproofing before spending it on a rain head that sprays cold water against the ceiling.
What the installation actually involves
The first step is shutting off the water and opening the wall or access panel. The installer identifies hot, cold, shower, and tub connections, then cuts out the old valve without damaging more pipe than necessary. Copper may be soldered, threaded, or connected with approved press fittings. PEX is common in newer work, but the valve must be supported firmly so the handle does not flex the plumbing every time someone turns it.
The new valve has to sit at the manufacturer-specified depth behind the finished wall. Too far forward and the trim will not seat. Too far back and the handle may barely engage. This is where rushed work creates an expensive second visit. The installer should also cap unused outlets, secure the valve to blocking, and test hot and cold operation before the wall closes.
With a shower valve replacement behind tile, protect the waterproofing system. Do not smear random silicone around a hole and call it sealed. A cement-board or foam-panel repair needs compatible waterproofing membrane and properly treated seams. If the wall is opened, take a photograph of the piping before closing it. That picture can save the next person an hour of guessing.

Can you do it yourself?
A cartridge swap is reasonable for a careful homeowner who can identify the brand, shut off the water, and follow the manufacturer instructions. Turn off the supply, remove the handle and trim, pull the retaining clip or bonnet nut, and use the correct cartridge tool. Do not twist hard enough to break the valve body inside the wall. If the cartridge will not come out, stop before turning a $40 repair into a flooded wall.
Full shower valve replacement is different. It involves cutting and joining water lines, maintaining correct depth, and pressure-testing connections that may be buried behind finished surfaces. If you cannot clearly identify the pipe material, do not have a reliable shutoff, or would need to solder next to wood framing, call a licensed plumber. The cost of professional labor is cheaper than water damage, mold remediation, and replacing a ceiling below the bathroom.
There is one more trap: replacing trim without checking the valve. Trim kits are not universally interchangeable. A Moen trim kit generally needs the matching Moen valve family, and Delta trim depends on the installed rough-in series. Take a picture of the handle, plate, and valve markings before buying parts.
A practical replacement checklist
Before scheduling shower valve replacement, write down the brand and model if you can find them. Note whether the shower has a tub spout, handheld outlet, body sprays, or two separate handles. Check the wall behind the valve for an existing access panel. Measure the approximate distance from the finished wall to the valve center, but let the installer verify the rough-in.
Ask for a clear scope of work. It should say whether the price includes the valve, trim, shutoff work, access opening, pressure test, wall repair, tile replacement, and disposal. Ask who repairs the waterproofing if the wall is opened. A low plumbing estimate that excludes every finish item may not be low after all.
For a normal single-handle tub shower, I would rather see a dependable Delta or Moen valve installed correctly than an expensive designer fixture installed with unsupported pipe and a sloppy wall patch. Save the old cartridge and valve information in a labeled bag. Future-you will appreciate it when the handle starts dripping on a Sunday morning.
The bottom line is simple: replace a cartridge when the valve body is sound, but choose full shower valve replacement when the body is cracked, inaccessible, obsolete, or badly installed. Get the plumbing right, waterproof the opening, and use a brand with parts you can actually buy. A bathroom built right once is a bathroom you forget about. That's the point.


No notes yet — be the first to inscribe one.