A shower enclosure is one of those bathroom purchases that looks simple in a showroom and gets complicated the minute you measure an old house. The glass is only the part you see. Behind it are wall framing, waterproofing, tile slope, drain placement, hinges, seals, and a floor that may not be level. Get those details right and you have a clean, quiet shower that works for years. Get them wrong and you will be scraping mildew from the bottom track every Saturday.
I have installed plenty of enclosures in Philadelphia row houses, including bathrooms where nothing was square and every wall had three layers of old tile. The best choice is rarely the most expensive display. It is the enclosure that matches the opening, the waterproofing system, and the way your household actually uses the room.
Choosing a shower enclosure for an older bathroom
Start with the opening, not the style board. Measure the width at the bottom, middle, and top, then measure both diagonals. If those diagonal measurements differ, the opening is out of square. That is common in homes built before 1980. A framed unit can hide a little irregularity, while a frameless shower enclosure usually needs straighter, flatter surfaces and tighter tolerances.
The next question is configuration. A pivot door needs room to swing, including space for the handle. A sliding bypass door saves floor space but has a bottom track that collects hair and soap. A corner neo-angle unit can rescue a tight bathroom, although the angled glass reduces elbow room. For most standard alcoves, I prefer a single pivot door with a fixed panel. There are fewer rollers to fail, fewer tracks to clean, and the opening feels bigger.
Do not let a salesperson tell you every wall can support heavy glass without preparation. A 3/8-inch glass panel is substantial, and hinges need solid blocking or a properly engineered mounting surface. If the wall is just drywall over questionable studs, the fancy door is not the first thing to order.

Glass, frames, and hardware that earn their price
Clear tempered glass is the normal choice for a shower enclosure, and 3/8-inch glass is a sensible middle ground for many residential installations. Half-inch glass feels more substantial, but it adds cost and weight without automatically making the bathroom better. Tempered glass is strong for normal use, but it cannot be cut or drilled after tempering. Every hole and edge must be correct before the glass shop starts.
Textured or patterned glass gives more privacy and hides water spots better than ultra-clear glass. Low-iron glass looks noticeably less green, especially beside white tile, but the upgrade can add several hundred dollars. That is money I would spend only after handling the sample in the actual bathroom. Showroom lighting lies for a living.
Hardware finishes deserve practical thought. Polished chrome is usually the easiest to clean and often costs less than matte black or brushed brass. Black hardware shows mineral deposits quickly, particularly where hard water dries on the hinges. A quality shower enclosure from brands such as Kohler, Basco, DreamLine, or Fleurco can work well, but the model name does not replace proper installation. I would take a correctly installed midrange Basco over a badly fitted luxury door every time.
The seals matter more than people think. Look for replaceable vinyl sweeps and side seals rather than an odd proprietary strip that disappears from the market. A $20 replacement sweep is a maintenance item, not a sign that the enclosure failed. Water belongs inside the shower, and seals are the first line of defense.
Waterproofing comes before the glass
A shower enclosure does not waterproof the room. The tile assembly underneath needs a continuous waterproof layer, correctly tied into the shower pan and drain. Cement board by itself is not waterproof. Neither is green drywall, despite what many old bathroom remodels suggest. Products such as Schluter Kerdi, Wedi, and USG Durock systems can all work when their seams, corners, niches, and penetrations are treated according to the manufacturer's instructions.
Pay special attention to the curb or threshold. It needs to slope toward the drain, not toward the bathroom floor. I have demolished showers where the tile looked acceptable but the curb held a shallow puddle against the glass. That water eventually found a weak joint. A shower enclosure installed on top of a poorly waterproofed curb is just a neat-looking leak waiting for a downstairs ceiling.
The pan should also be tested before tile and glass go in. Plug the drain, fill the pan to a safe level, and leave it long enough to confirm that the level does not drop. A plumber should handle the drain connection when access is difficult or the piping is questionable. Saving $300 on that part is foolish if the repair requires removing a finished ceiling.
What installation should cost
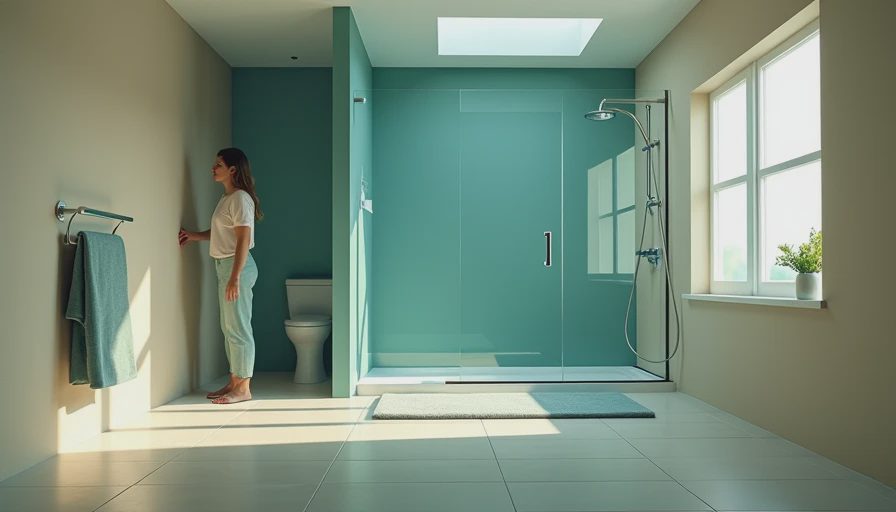
For a straightforward alcove, the shower enclosure itself commonly runs from about $700 to $2,000 for a decent framed or semi-frameless unit. Custom frameless glass often lands between $1,500 and $4,000, depending on size, thickness, hardware, glass treatment, and how much the opening needs to be corrected. Labor for measuring and installing the glass may add $500 to $1,500. Tight urban bathrooms, stair access, removal of an old unit, and custom glass push the number higher.
A complete shower remodel is a different budget. Demolition, plumbing changes, waterproofing, tile, fixtures, and glass can put a normal older-home bathroom project in the $12,000 to $25,000 range in many US markets. That is not a quote for every bathroom, but it explains why a $900 enclosure cannot be judged separately from the work around it.
Get the glass measured after the tile is installed, not from an architect's rough drawing. The installer should verify finished dimensions, plumb, level, hinge clearance, and the location of blocking. Some companies charge a measurement fee and apply it to the final order. That is reasonable. The measurement is insurance against an expensive piece of glass made to the wrong opening.
Common mistakes I would avoid
The first mistake is ordering the door before the walls are finished. Tile thickness, trim, waterproofing, and the shower pan all change the final dimensions. The second is putting a hinged door where a towel bar, vanity, or toilet blocks its swing. Tape the door arc on the floor before ordering anything.
Another mistake is relying on caulk to correct a bad fit. Silicone seals a joint; it does not replace a level threshold or compensate for a wall that leans an inch. Use 100 percent silicone at the appropriate tile-to-metal joints, keep weep paths open, and do not smear caulk across every moving part.
Finally, do not skip ventilation. Even a well-built shower enclosure produces humidity. A properly sized exhaust fan vented outdoors protects grout, paint, trim, and framing. Run it during the shower and for 20 minutes afterward. That small habit does more for the bathroom than an expensive water-repellent glass coating.
The practical decision
For a family bathroom, I would usually choose clear 3/8-inch glass, a single pivot door, solid blocking, and a reputable semi-frameless system. I would spend money on waterproofing, accurate measurement, and a good exhaust fan before upgrading to half-inch glass or fashionable hardware. If the room is tight, choose a sliding door only when the cleaning tradeoff is acceptable.
A shower enclosure should make the finished bathroom easier to live with, not turn every morning into a maintenance ritual. Choose the configuration first, prepare the structure, waterproof the assembly, and let the glass installer measure the real opening. A bathroom built right once is a bathroom you forget about. That's the point.


No notes yet — be the first to inscribe one.